Practical Guide · AI Video
How to Make an Orange Booth AI Video with Two Photos
Turn two photos into an orange booth AI video. Compare photo inputs, prepare group-photo crops, choose settings, and keep both faces recognizable.
Before and After Examples
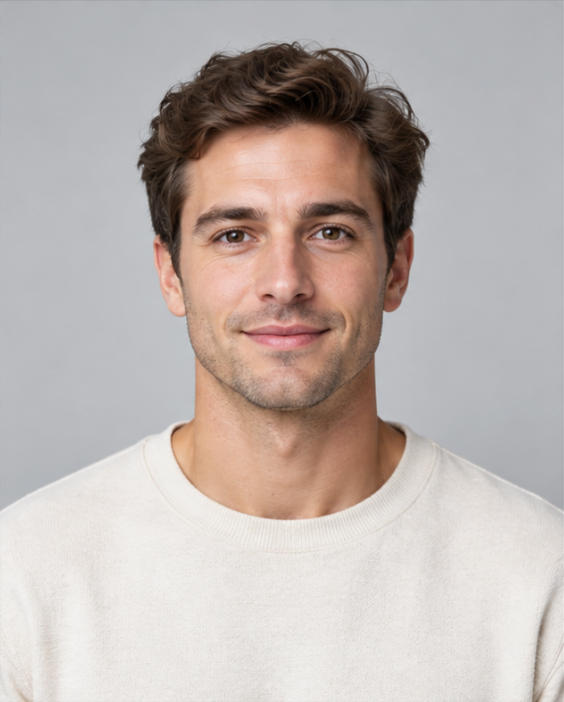
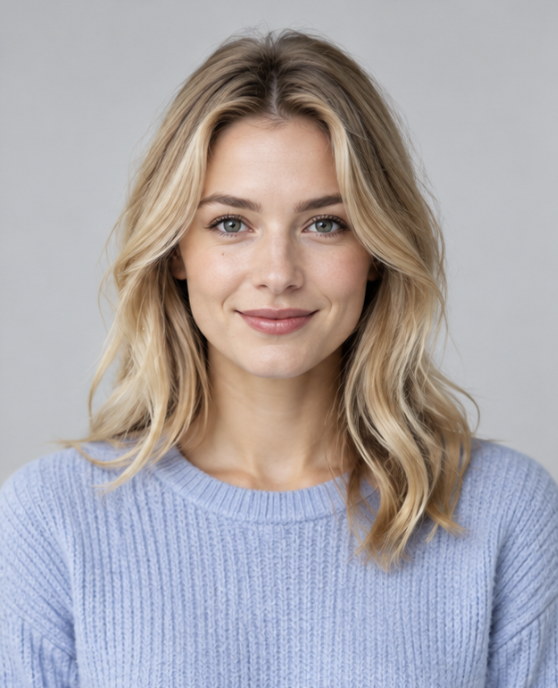
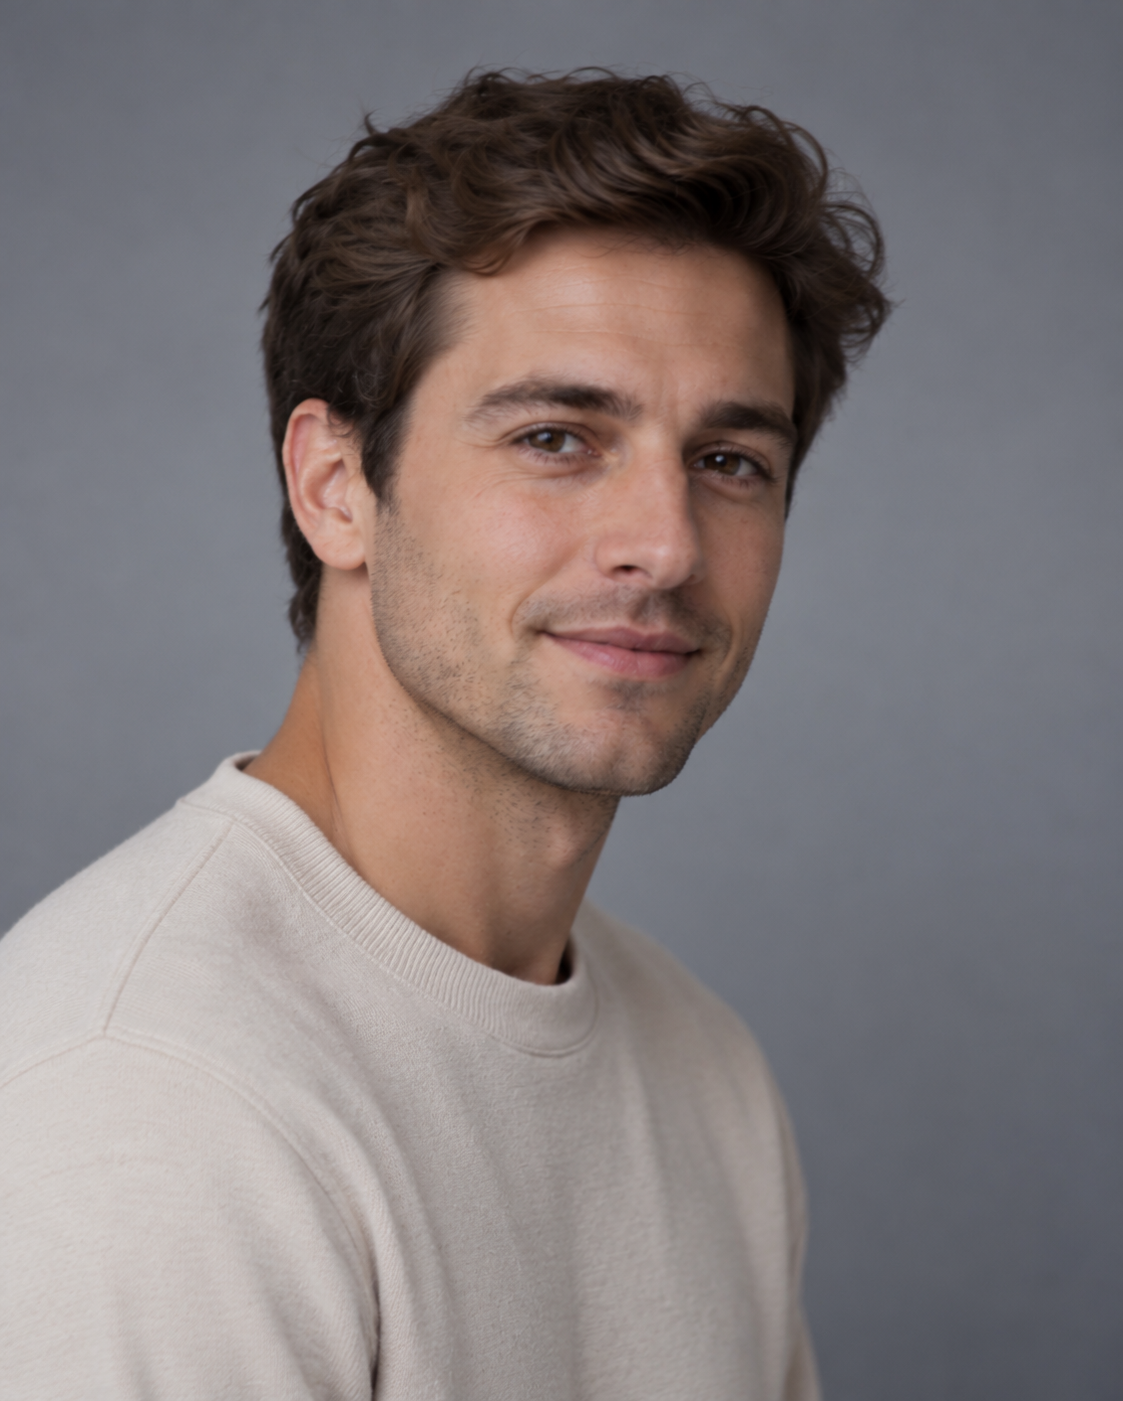
Actual result · 1344 × 768 · approximately 4.46 seconds · includes audio
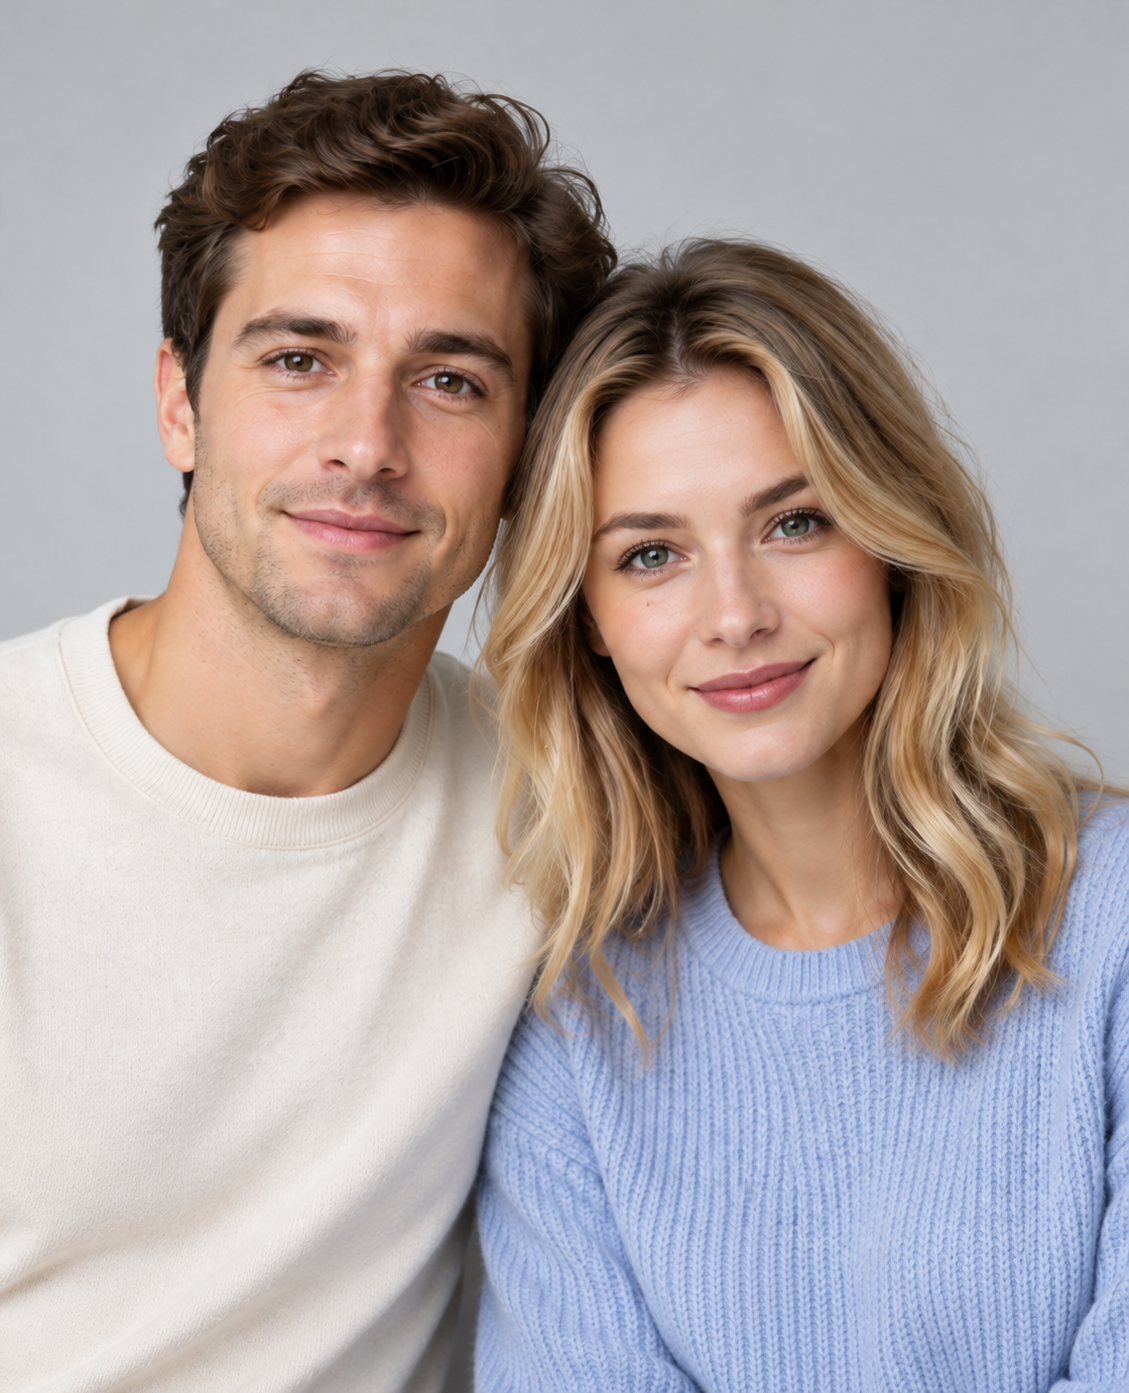
Actual result · 768 × 1344 · approximately 4.46 seconds · includes audio
The existing homepage example shows the two independent portraits below turned into an orange-studio duo. Play the full video with sound and compare each performer with the corresponding source image.
This is an existing generated example, not a new controlled test of the latest prompt. It demonstrates the format but cannot establish whether independent portraits outperform crops from a group photo.
Clear Independent Portraits
The first reference shows a man facing the camera in a light sweater. The second shows a woman facing the camera in a blue sweater. Both have clearly visible faces and simple backgrounds. These are useful starting references because neither image requires the model to choose between multiple people.
A Side-Angle Portrait Paired with a Clear Portrait
The second input pair replaces the man's front-facing reference with the supplied side-angle portrait and keeps the woman's reference unchanged. This changes the angle and lighting of one subject while retaining the same second performer.
In the supplied result, both performers appear together in a wide orange-studio shot. They turn toward each other and use small hand gestures. The side-angle reference produces a recognizable interpretation of the man, but this single result does not establish that it performs as well as a front-facing reference. Watch his face during the head turn and compare the unchanged woman with her source portrait too.
Individual Crops from One Group Photo
For the third pair, the supplied group photo was cropped into two separate images before uploading, one for each person. The original group photo is shown above for context; it was not submitted as a single shared reference. The exact uploaded crops are not shown.
Their heads are close together in this photo. Keep as much of each face as possible, and avoid leaving the other person's face visible in either crop. Because their outlines overlap, a crop may retain a little of the other person's hair or clothing. That is different from having a second complete face in the reference.
The cropped-photo result uses a vertical composition. Both people remain visible in the sampled frames, with the man moving closer to the camera and the woman partly behind him during the performance. This differs from the wider side-angle result and illustrates why the frame also matters.
Both supplied comparison clips contain audio and run for approximately 4.46 seconds. The side-angle result is 1344 × 768, while the group-photo crop result is 768 × 1344. Because the output frames differ and the full generation settings have not been verified, these are illustrative results rather than a controlled same-settings test. They do not establish a winning photo approach or a universal success rate.
Two Separate Portraits vs. Crops from One Group Photo
The two people do not need to appear in the same original photo. Separate portraits give each performer a distinct reference. If you only have a photo together, crop it into two individual portraits before uploading.
The current generator requires two image inputs. It does not offer a one-file group-photo mode. A photo containing both people therefore needs preparation before it fits this workflow.
With independent portraits, each upload already contains one person. With a group photo, your first task is to create two useful crops. Crop quality depends on the original image: how large each face is, how much the people overlap, and whether both faces are in focus.
| Input approach | Preparation | What to inspect |
|---|---|---|
| Two separate portraits | Choose one image per person | Face clarity, angle, lighting, and distinct identity |
| Two crops from a group photo | Crop each person separately | Remaining resolution, face overlap, and whether another face is still visible |
| One uncropped group photo | Does not match the intended two-portrait workflow | Prepare two individual crops first |
Different backgrounds are acceptable starting references; the generated scene uses an orange studio. There is no need to photograph both people against an orange wall. However, the output may reinterpret clothing, hair, and facial details, so preview the full result rather than judging a single still frame.
Choose the Best Photos
Start with photos where both faces are easy to read. A clear front-facing portrait is a practical first choice, especially when you want to compare the generated face with the reference.
- Choose one person per image, with the eyes, nose, and mouth visible.
- Prefer even lighting over deep shadows across the face.
- Avoid sunglasses, heavy blur, face-covering objects, and strong filters.
- Leave room around the head and shoulders rather than cutting through facial features.
- For group-photo crops, work from the original full-resolution image instead of a small screenshot.
The two images do not need identical dimensions or backgrounds. What matters is that each one provides a usable reference for its intended performer. If one image is much less clear than the other, consider replacing it before spending credits.
Upload Your Photos
Open the orange booth generator. Click Upload left photo for the first person, then Upload right photo for the second.
The generator accepts JPG, PNG, or WebP, up to 10 MB per image. Check both previews after selecting the files. Confirm that each slot contains the intended subject and that no second face remains in a cropped reference.
The slots guide left and right placement, but the generated video may vary. Review the positions in the finished clip rather than treating the upload labels as a guarantee.
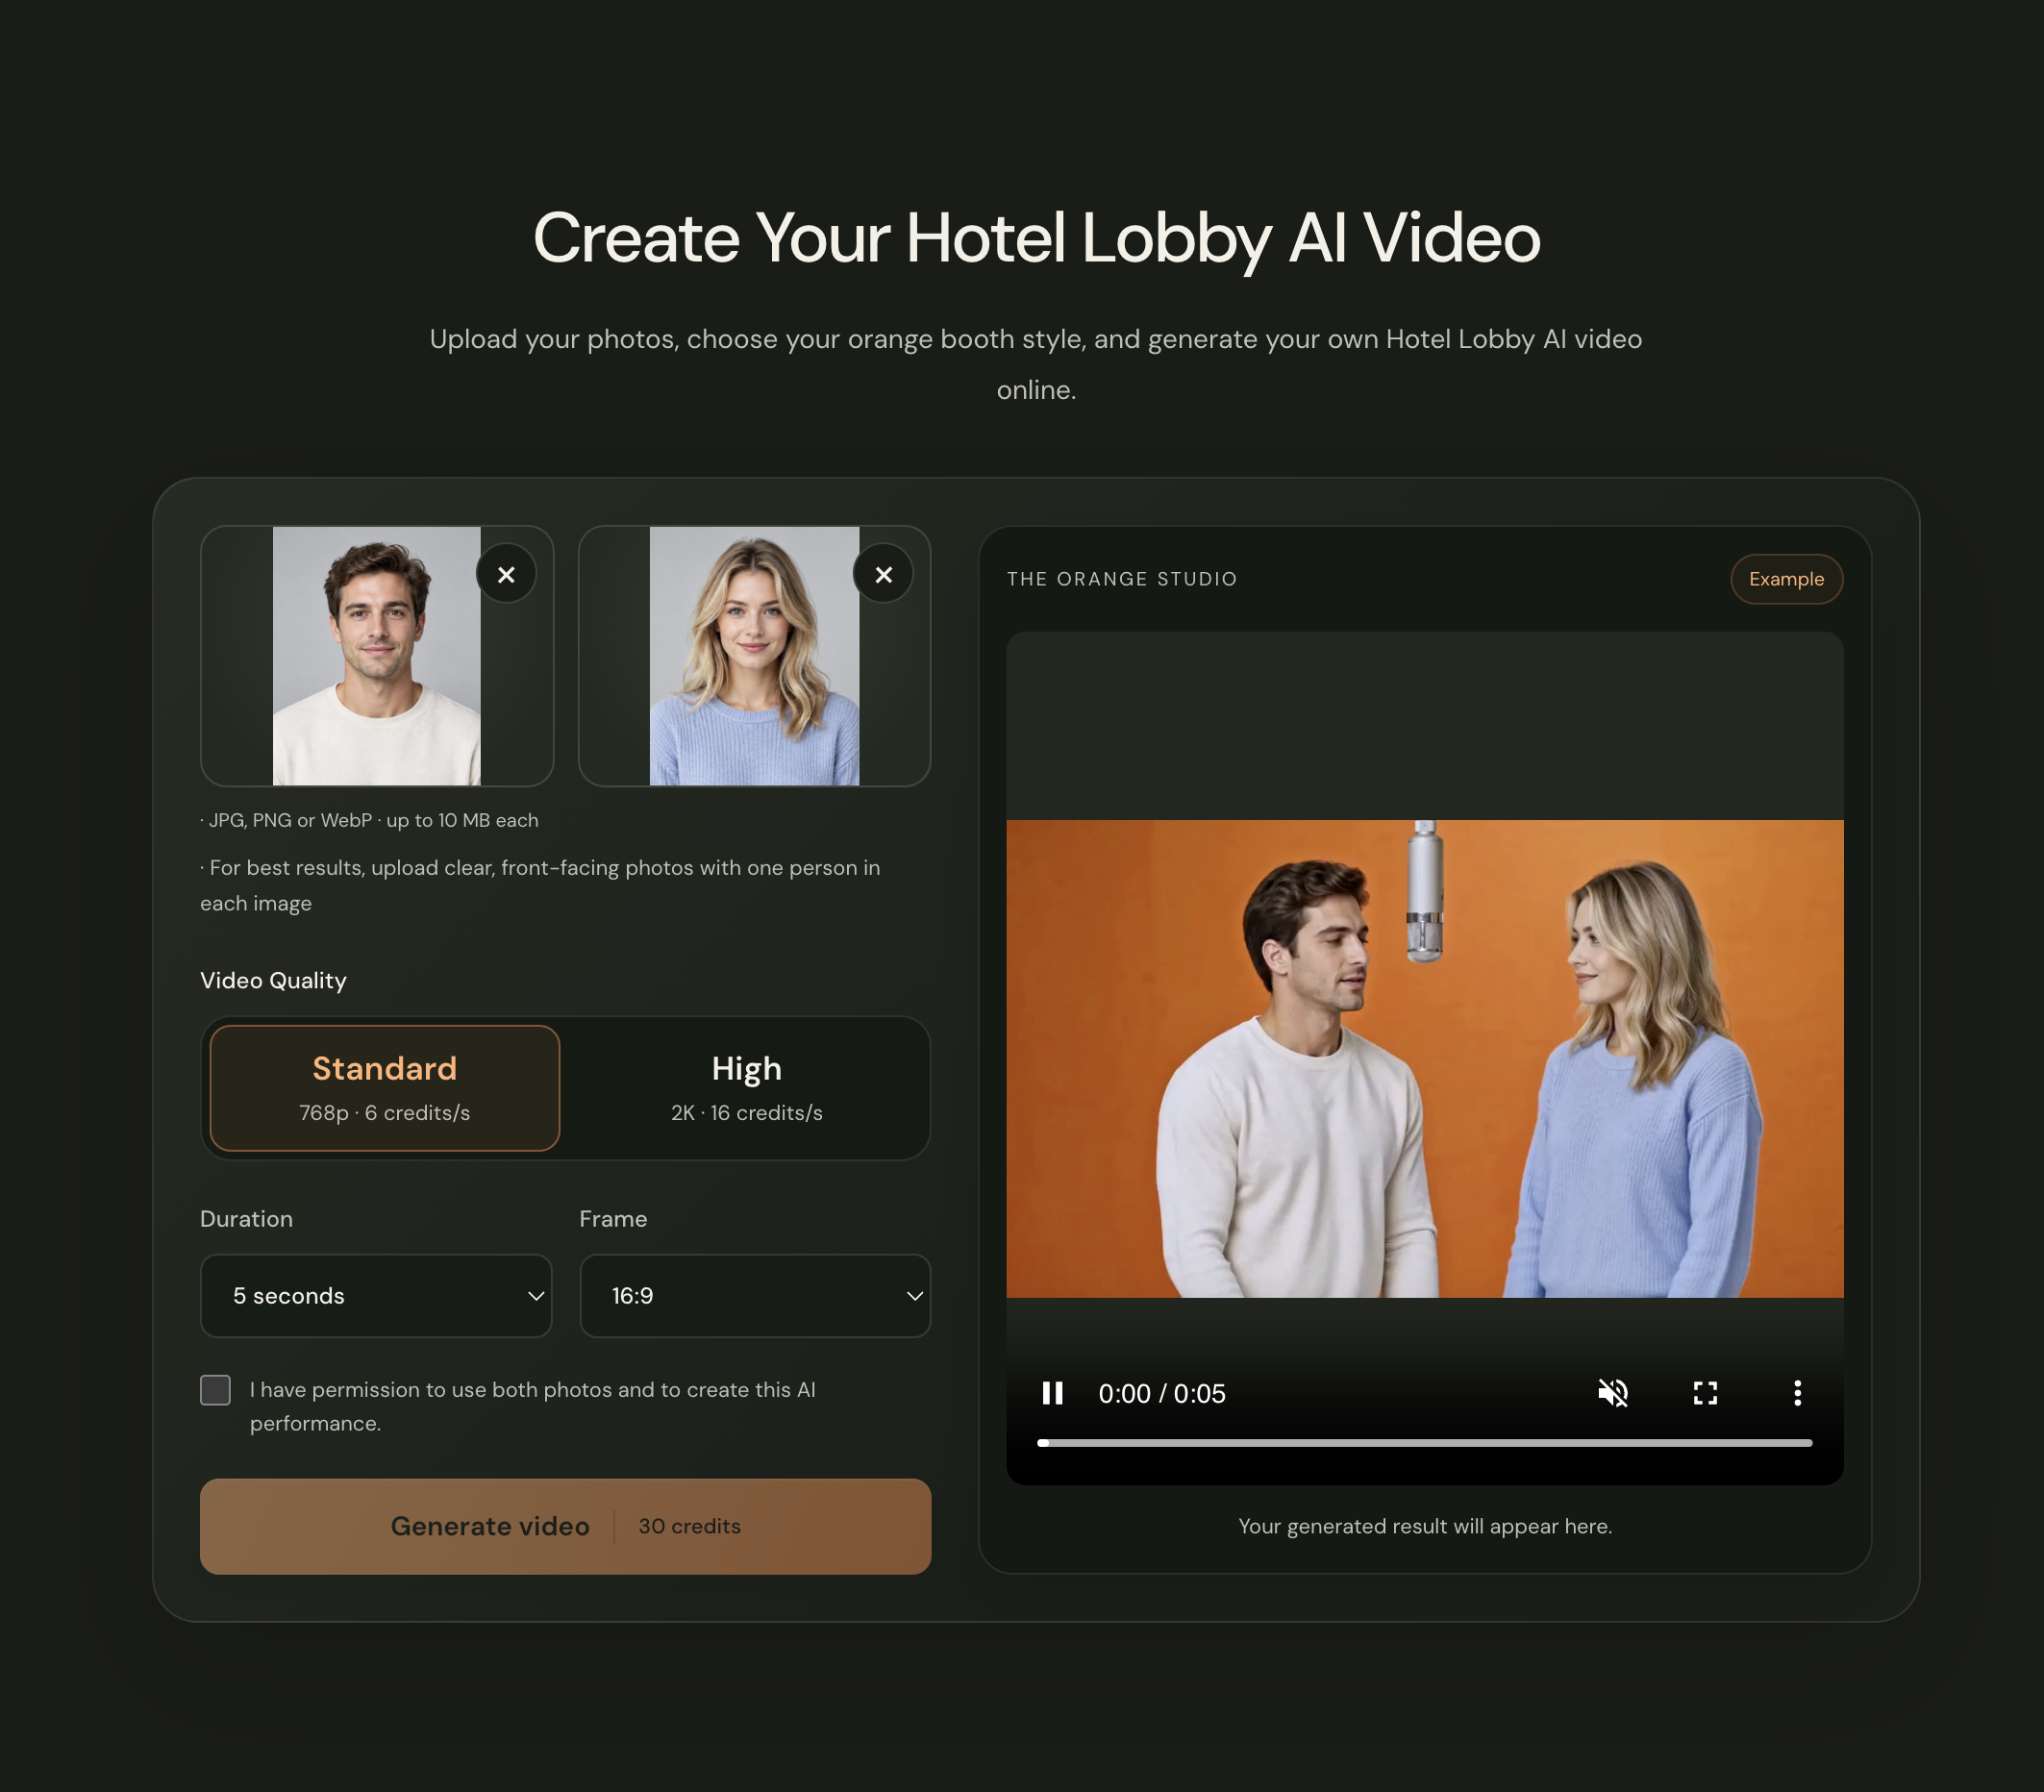
Actual website screenshot. The panel marked Example is the existing demonstration video, not a fresh result from this upload.
Local previews stay in your browser. Clicking Generate submits both images to WaveSpeedAI for processing. Use photos you have permission to include in an AI performance.
Choose Video Settings
Choose a duration from 4 to 15 seconds, quality of 768p or 2K, and a frame of 9:16, 16:9, or 1:1.
For a controlled comparison of photo inputs, use a short clip and hold the prompt, duration, quality, and frame constant. A practical starting configuration is 5 seconds, 768p, and 16:9. This is a recommendation for a future controlled test, not a record of the displayed clips' generation settings. The supplied side-angle and group-photo crop results have different output frames.
For your own first attempt, 4–5 seconds provides a short performance to review. Choose 9:16 for a vertical layout, 16:9 for a wide view, or 1:1 for a square composition. Higher resolution provides the higher-quality output option but does not guarantee more accurate faces.
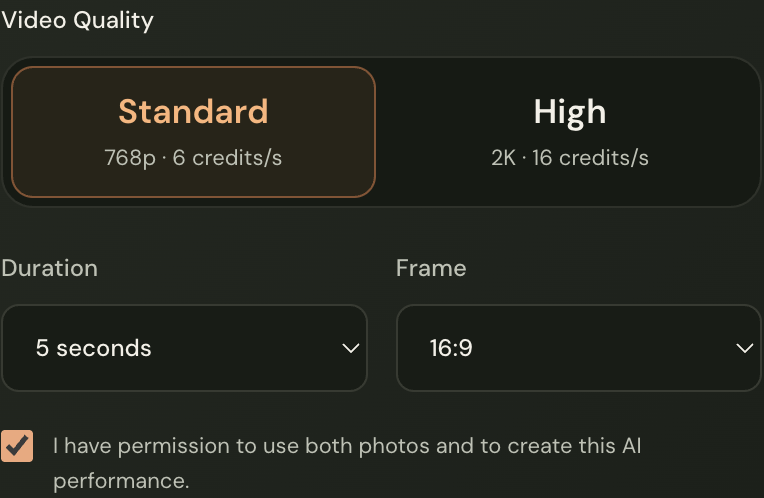
Actual website settings. Always review the current credit cost before generating.
Generate Your Orange Booth Video
Sign in, check the displayed credit cost, and confirm permission to use both images. Then click Generate video.
Generation typically takes about one minute. The generator automatically creates audio and supports the original “HOTEL LOBBY” track and lip sync. Turn on sound when reviewing the result, and check what your particular clip produced.
If progress stops updating, click Check status before submitting another request. An interrupted update is not proof that generation failed. Keep your task ID if the page asks you to contact support.
When the result is ready, watch the whole clip and click Open / save video. Each new generation uses credits. Confirmed failures return reserved credits with their original expiry dates; an uncertain submission needs a status check first.
For a more detailed walkthrough, read How to Make a Hotel Lobby AI Video: Step-by-Step Guide.
How to Keep Both Faces Recognizable
Give each subject a separate, clear reference and keep the images associated with the intended slots. In the current prompt, the first reference guides the left performer and the second guides the right. The prompt also asks for distinct identities, consistent positions, and recognizable facial details.
These instructions guide the model; they do not guarantee exact likeness. When you review a result, ask:
- Can you distinguish the two people throughout the clip?
- Does either face change during head turns or hand movement?
- Do they maintain their intended positions?
- Are facial features recognizable at the beginning, middle, and end?
If one face looks less accurate, replace that person's photo first and keep the other input and settings unchanged. This gives you a clearer comparison than changing both photos and the duration together.
Common Mistakes
Uploading a Full Group Photo as an Individual Reference
Each slot is intended for one subject. Crop a group photo into two portraits rather than relying on the model to identify the intended person from a shared image.
Cropping Too Tightly or Leaving Both Faces Visible
Do not cut through a face just to remove the background. Check the saved crop at its actual size: a tiny face enlarged on screen may still lack detail.
Changing Several Variables at Once
If you change both portraits, the prompt, and the frame, you cannot tell which change affected the result. Keep a record of the input pair and settings for each attempt.
Treating One Successful Clip as a Guarantee
AI outputs can vary even with similar inputs. An existing example shows a possible result, while a controlled comparison provides evidence about specific samples. Neither establishes a universal success rate.
Submitting Again Before Checking Status
Use Check status when updates stop. Avoid a duplicate submission while the first task may still be processing.
FAQ
Can I Use Two Photos Taken Separately?
Yes. Upload one person in each slot. The generator creates a shared orange-studio scene from those separate references.
What If I Only Have One Photo of Us Together?
Crop the photo into two individual portraits and upload them separately. Check that each crop contains one clear face and retains enough detail.
Can the Photos Have Different Backgrounds?
Yes. The photos provide subject references, and the output uses the orange booth scene. Simple backgrounds can make the intended subject easier to distinguish.
Can I Use the Same Photo in Both Slots?
You can select the same file twice, but this does not provide two distinct identities. For a two-person performance, use a separate reference for each person.
Why Does One Face Look More Accurate Than the Other?
The references may differ in clarity, angle, lighting, or visibility, and generation itself can vary. Try a clearer photo of the less recognizable person while keeping the other reference unchanged.
Is Creating the Video Free?
Local upload previews are free. Generation requires credits, and new accounts do not receive free trial credits. Review the cost shown for your settings and visit Pricing if needed.
Your photos. Your performance.
Turn Your Two Photos into an Orange Booth Video
Prepare one clear photo per person, check your two previews, and start with a short clip. If your only source is a group photo, make two individual crops first.