Practical Guide · AI Video
How to Make a Hotel Lobby AI Video: Step-by-Step Guide
Learn how to make a Hotel Lobby AI video from two photos, with real website screenshots, a generated example, photo tips, troubleshooting, and FAQs.
A Hotel Lobby AI Video Example
Two portraits. One orange booth performance. Compare the original references with the actual video generated on this website.
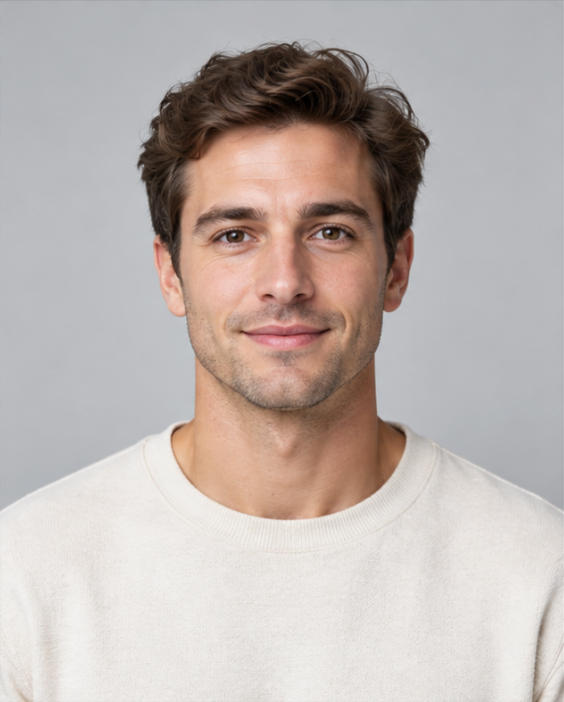
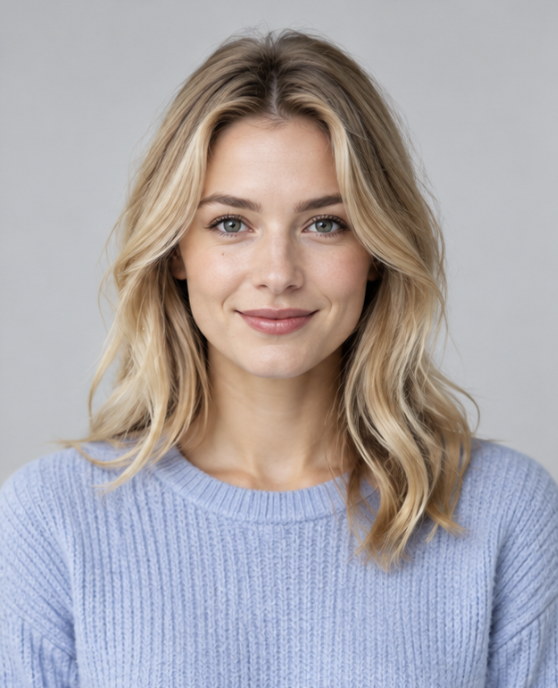
The homepage includes a video labeled “Actual result generated on this website”, alongside the two source photos used to create it.
This pairing illustrates the core workflow: two separate portraits provide references, and the output places two performers together in an orange studio scene beneath a hanging microphone.
When watching the example, compare each photo with its corresponding performer. Notice which facial features remain recognizable and how the video introduces movement beyond the still references. Listen to the audio while reviewing the lip sync.
Use the example to understand the format, rather than as a promise that your result will look identical. Different photos and settings can produce different facial details, composition, and movement.
You can also explore the homepage’s video examples for friends, couples, pets, and other duo ideas. A template provides creative direction and supported settings; it does not reproduce the same performance every time.
What Is a Hotel Lobby AI Video?
The generator turns your photo references into an original two-performer scene inspired by the recognizable orange studio and hanging microphone aesthetic. It automatically generates audio and supports the original “HOTEL LOBBY” track and lip sync. You do not need to film a performance or assemble the scene in a video editor.
This guide walks you through the process, explains how to choose useful source photos, and shows what to check if your result needs improvement.
A Hotel Lobby AI video is an AI-generated performance inspired by the orange studio aesthetic associated with Quavo and Takeoff’s “HOTEL LOBBY” performance on A COLORS SHOW. The recognizable setup usually includes two performers, an orange backdrop, and a suspended microphone.
With photo-to-video generation, you can adapt that visual idea using yourself and a friend, a couple, or another creative pairing. Your photos provide references for the subjects; the AI creates the performance around them.
This website is an independent creation tool and is not affiliated with the original performers or COLORS. Expect an original AI interpretation rather than an exact recreation of the original performance.
What You Need Before You Start
Prepare the following:
- Two separate photos: one for the left performer and one for the right.
- Supported image files: JPG, PNG, or WebP, up to 10 MB each.
- An account and enough credits: generation requires credits; new accounts do not receive free trial credits.
- Permission to use both photos: everyone featured should agree to the AI performance.
Uploading photos for a local preview is free. When you generate, both photos are sent to WaveSpeedAI for processing.
You can choose a duration of 4–15 seconds, quality of 768p or 2K, and a frame of 9:16, 16:9, or 1:1. The credit cost depends on duration and quality and appears before submission. Check Pricing if you need credits.
Turn on your device’s sound when reviewing the finished video so you can check both the generated audio and lip sync.
Step-by-Step: Create Your Hotel Lobby AI Video
Step 1: Upload Your Two Photos
Open the generator. Click Upload left photo and select the first portrait, then click Upload right photo and select the second.
Use a separate image for each subject. If your starting image is a group photo, choose individual portraits instead, or crop it into two clear images with one subject in each.
Review the thumbnails before continuing. Make sure the correct person appears in each slot and that neither face is too small, blurry, or partly outside the frame.
The left and right slots guide the intended scene positions, but AI generation does not guarantee that the subjects will stay in those exact positions throughout the video.
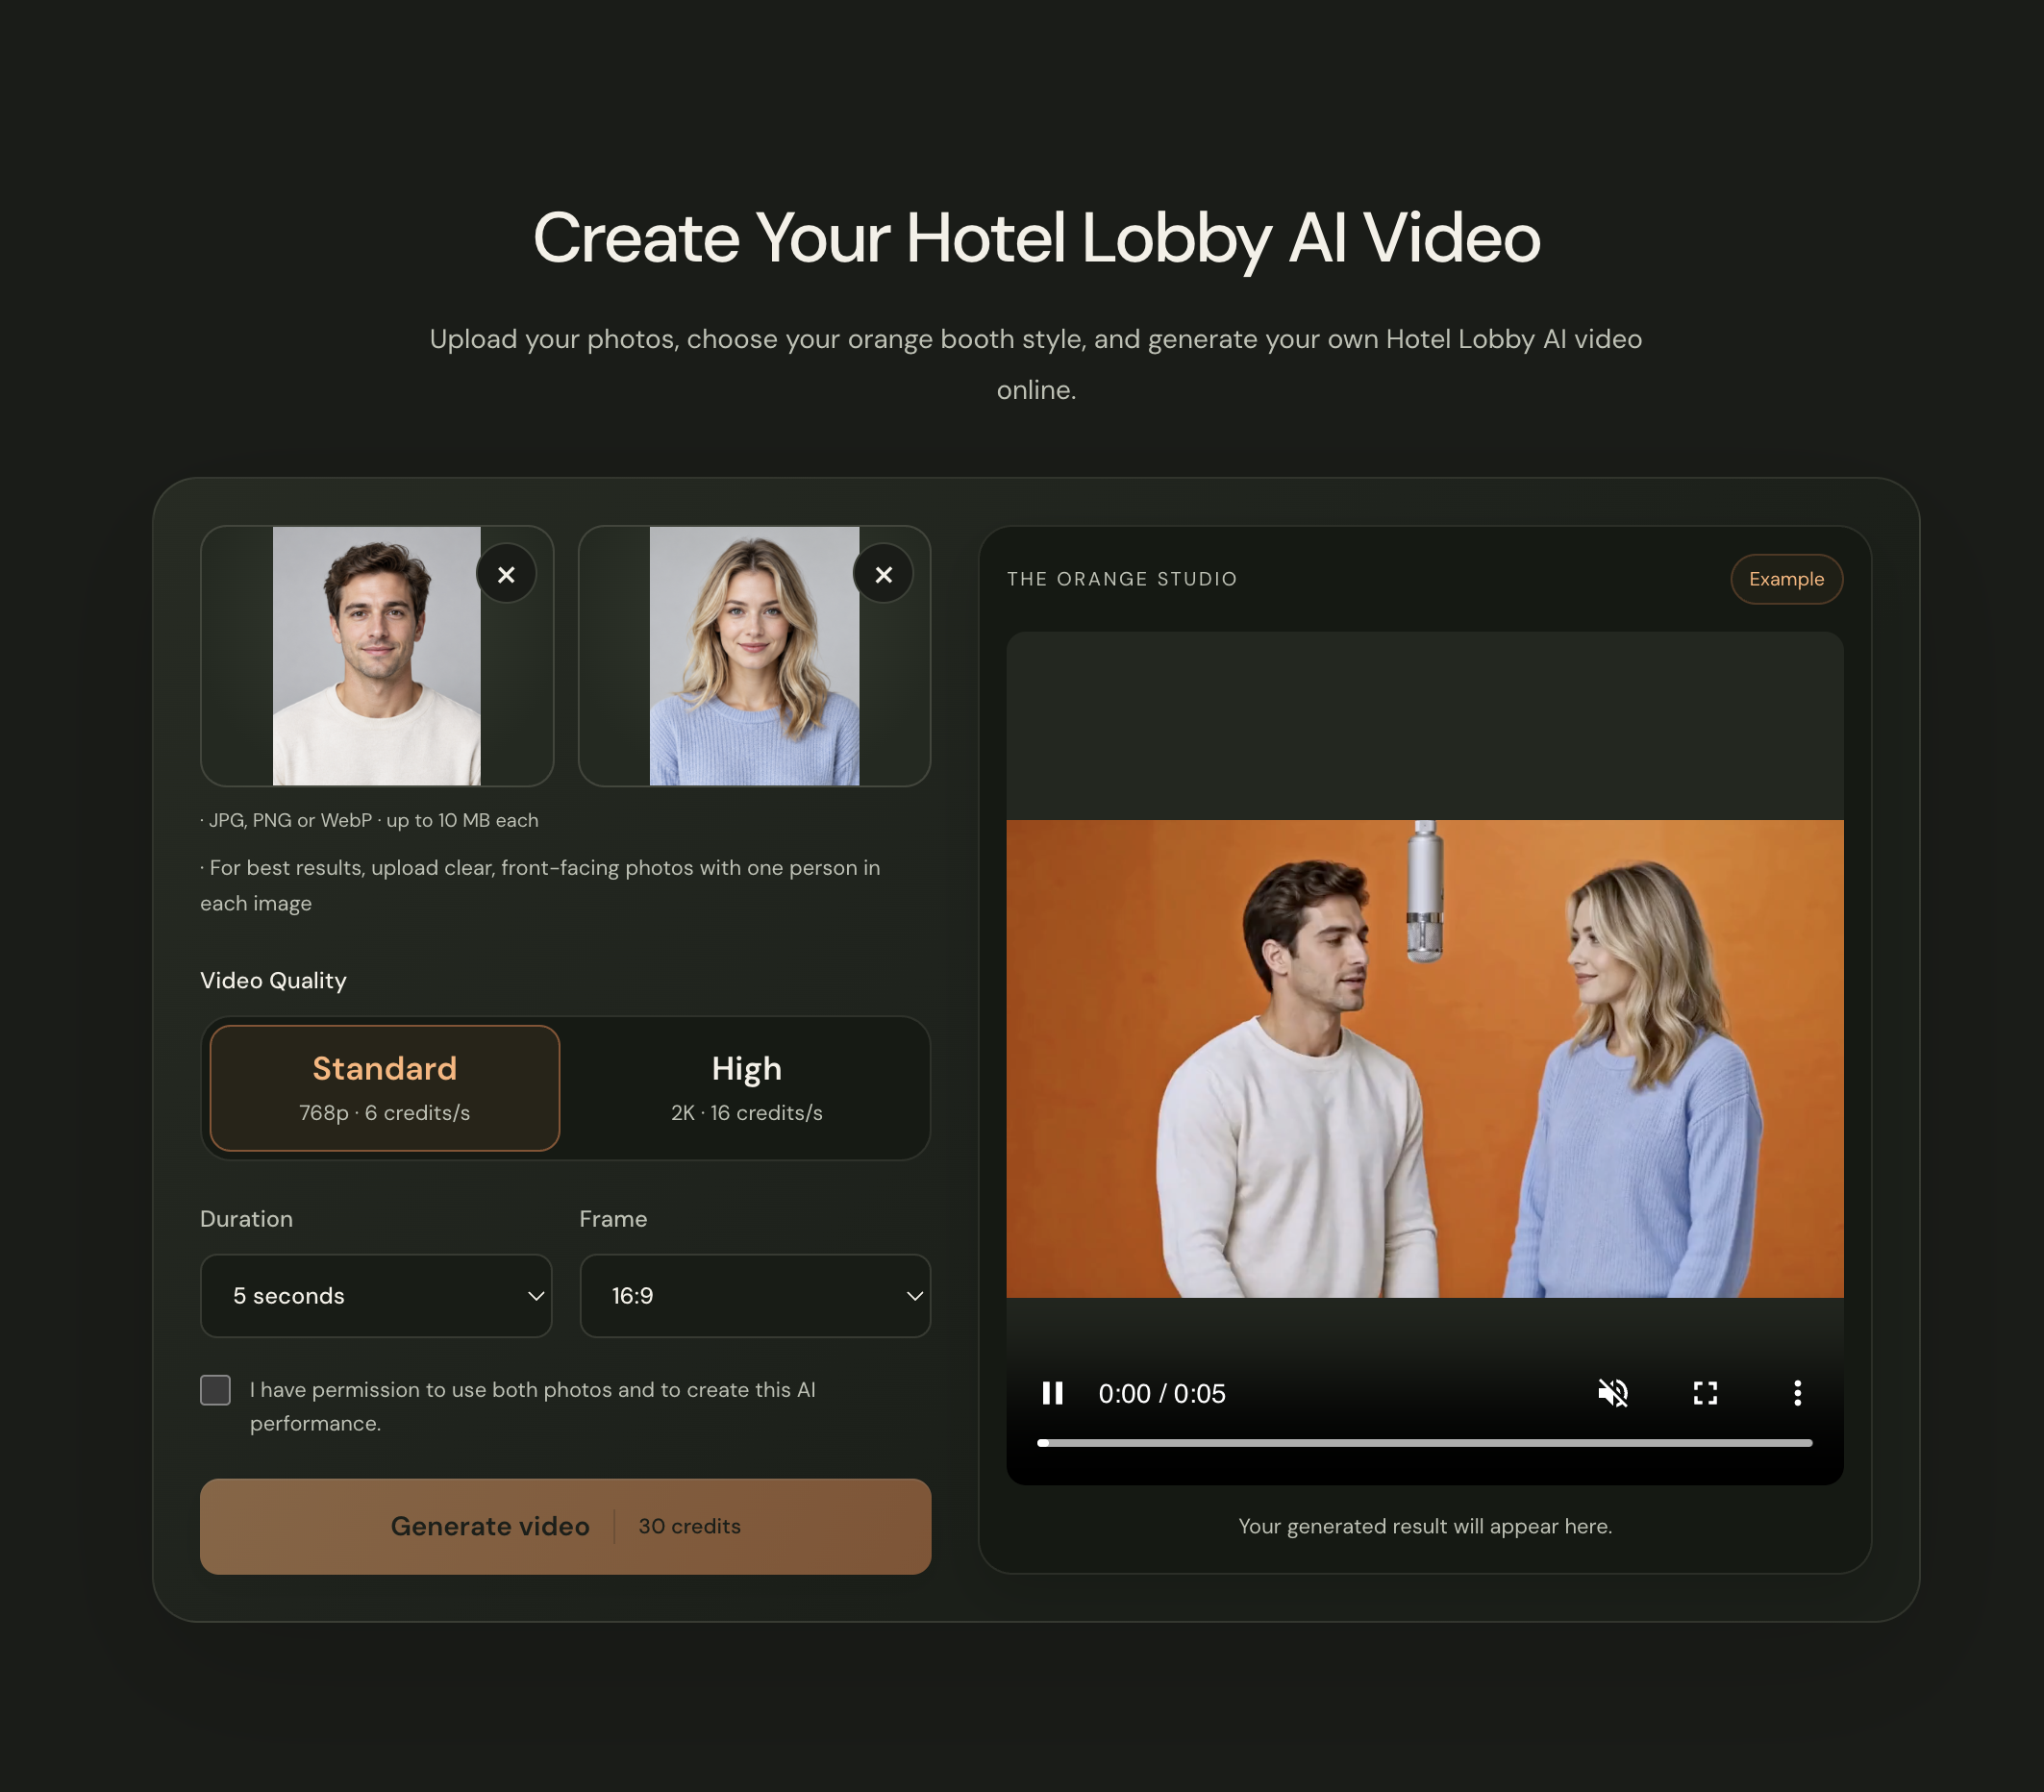
Actual website screenshot: the two uploaded portraits appear beside the studio’s example preview. The Example preview is not a new result from this upload.
Step 2: Choose Duration, Quality, and Frame
Choose settings that fit how you plan to use the video.
For a first attempt, a 4–5 second clip gives you a short result to review before spending credits on a longer performance. Start with 768p if you want to evaluate the pairing and movement first. Select 2K when you want the higher-resolution option; it does not guarantee more accurate faces or anatomy.
Choose the frame based on your intended layout:
| Frame | Useful for |
|---|---|
| 9:16 | A vertical composition for short-form social posts |
| 16:9 | A wide composition with more horizontal space |
| 1:1 | A square composition |
Check the displayed credit cost after changing duration or quality. Each new generation uses credits, including a retry with different photos or settings.
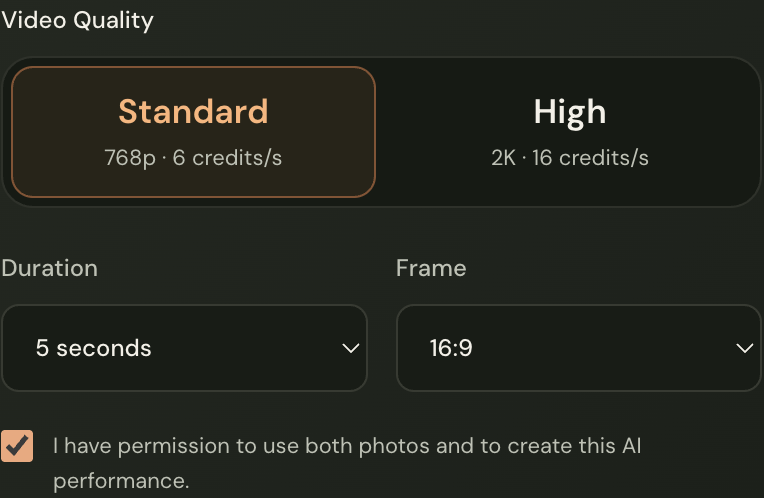
Actual website settings. The full studio screenshot above shows the Generate video button and its displayed credit cost.
Step 3: Choose an Optional Creative Template
If you want a starting idea, browse the video examples and click Try This Template on a pairing you like.
Templates apply a creative direction and supported generation settings. For example, the Friends template describes a relaxed friendship duo with playful, understated gestures. The Couple template suggests a coordinated duet with warm energy and complementary outfits.
After selecting a template, review your photos, duration, and frame before submitting. Template settings may differ from the dimensions of the example video shown on the page.
You can also use the generator without selecting a template. The current interface does not require you to write a prompt. The generator already asks for restrained movement and a fixed camera, although exact movement, timing, and identity are not guaranteed.
Step 4: Sign In, Confirm Permission, and Generate
Sign in if you have not already. Review your two photos and settings, then check the permission box confirming that you can use both images to create the AI performance.
Click Generate video.
Credits are reserved before submission. Watch the status messages as the task moves from preparation and submission to processing. Generation typically takes about one minute, though a particular task may take longer.
If progress stops updating, use Check status before starting another generation. A missing update does not necessarily mean the task failed. Keep the task ID if one is displayed, especially if you need support.
If the page says the provider may have accepted the task but its response could not be confirmed, contact support before submitting again.
Step 5: Preview and Save the Result
When the video is ready, watch the entire clip in the result preview with sound enabled.
Check both performers’ faces, their relative positions, hands, and movement. Listen to the audio and review how the mouth movements match it. Look at the opening and ending as well as the middle: a convincing frame does not necessarily mean the whole video is consistent.
Click Open / save video, then use your browser’s save or download controls.
If you want another version, change one photo or setting at a time. This makes it easier to understand which adjustment helped.
How to Choose Better Source Photos
Your photos are the most useful starting point for improving a result.
Choose a clear, front-facing portrait with the head and shoulders visible. Even lighting helps make facial features readable; avoid strong shadows across the eyes or face.
Use one subject per image. A crowded background or several people can make the intended performer less obvious. Avoid sunglasses, covered faces, and heavy blur.
For a two-person scene, choose photos in which both faces are easy to distinguish. If one portrait is sharp and well lit while the other is distant or obscured, replace the weaker reference before generating.
For pets, use one animal per image and choose a clear view of its face and recognizable features. Human performance poses may be a harder fit for animal anatomy, so review the finished movement carefully.
These choices can help the model interpret your references. They cannot guarantee exact identity preservation or eliminate every visual artifact.
Common Generation Problems and What to Try
The Faces Look Mixed or Unrecognizable
Check that each image contains one clearly visible subject. Replace blurry, small, or covered faces with sharper portraits. If only one performer looks wrong, change that reference first and keep the other settings consistent.
Hands or Movement Look Distorted
Try a short 4–5 second clip. The generator requests restrained movement, but results can vary. Review the full result before saving. Higher resolution alone does not guarantee correct anatomy.
The Camera Moves or the Performers Change Places
The generator requests a fixed camera, but results can vary. Check whether your photos provide distinct references for both subjects. Treat left and right placement as guidance rather than a guaranteed position.
Progress Stops Updating
Click Check status and read the latest message. Keep the page open if it says the task is still processing or taking longer than usual.
Do not immediately resubmit. If submission is uncertain, retain the task ID and contact [email protected].
A Generation Fails
Read the task status before retrying. Confirmed failures return reserved credits with their original expiry dates. An uncertain submission is different from a confirmed failure, so check its status first.
Frequently Asked Questions
Is the Hotel Lobby AI Video Generator Free?
Local photo previews are free. Video generation requires credits, and new accounts do not receive free trial credits. The cost is displayed before you generate.
Do I Need Two Photos?
Yes. This workflow uses separate references for the left and right performers. Prepare one clear subject per image.
Do I Need to Write a Prompt?
No. Start with your photos and the available settings. If you want a predefined creative direction, choose Try This Template from a video example.
How Long Does Generation Take?
Generation typically takes about one minute. If your task takes longer, check its status before submitting another request.
Will the Video Look Exactly Like the People in My Photos?
Exact identity is not guaranteed. Clear portraits can help, but facial details, movement, timing, and composition may change during generation.
Does the Video Include Audio and Lip Sync?
Yes. The generator automatically creates audio and supports the original “HOTEL LOBBY” track and lip sync. Preview your finished video with sound before saving or sharing it.
Can I Share the Result on TikTok or Instagram?
You can save the generated video and prepare it for sharing. Choose a suitable frame and confirm that you have permission to use the photos, music, and other content in your post.
Your photos. Your performance.
Create Your Own Orange Booth Performance
Choose two clear photos and start with a short clip to review your pairing. Once you are happy with the result, you can try another duration, frame, or template.